Inhaltsverzeichnis
Custom Apps and Plugins
To develop custom C++ components you should have set up a Developing Environment.
BPS Installation Notes
Then install the BPS software including the feature Software Development Kit, or choosing the Complete installation type respectively:
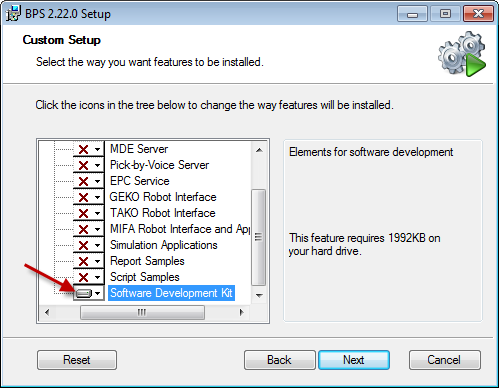
It is highly recommended to install BPS in a writable place such as in your dev folder. This way you can create your exe and dll files directly in the folders of the installation, which is the easiest way to test your apps and plugins:
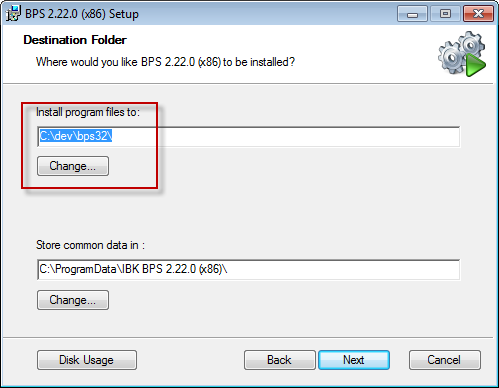
In case you are targeting both 32 and 64 bit installations, install the two editions of BPS side by side, for example in C:\dev\bps32 and C:\dev\bps64.
Main Project Setup
Create a root folder for your BPS developments, for example C:\dev\mybps\.
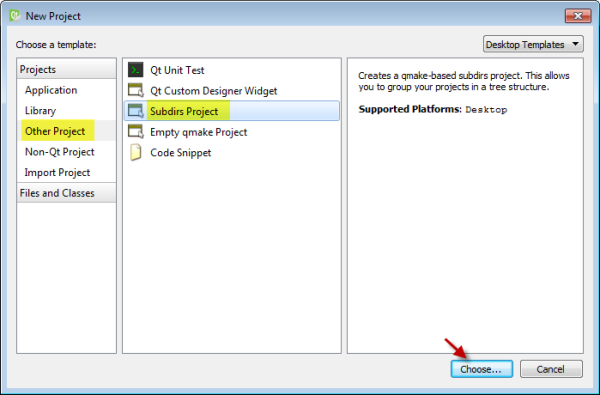
Start Qt Creator and create a new subdirs project in that folder:
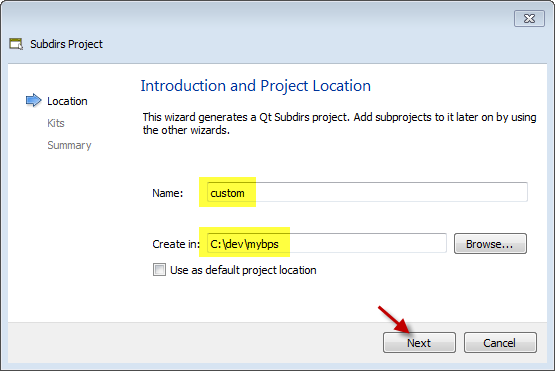
Give your project collection a name and select the folder where it will reside:
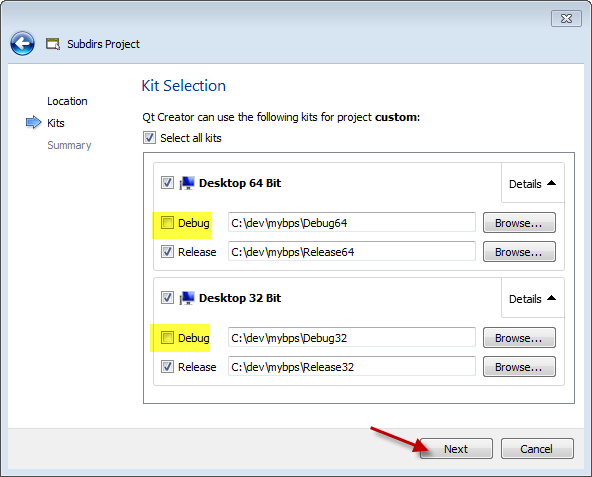
Select the kits that you want to build your apps and plugins for.
If you followed the instructions to set up the development machine exactly, all should be set as shown automatically. Uncheck the Debug options, we only need to create Release programs.
Finally let the project wizard finish the project setup.
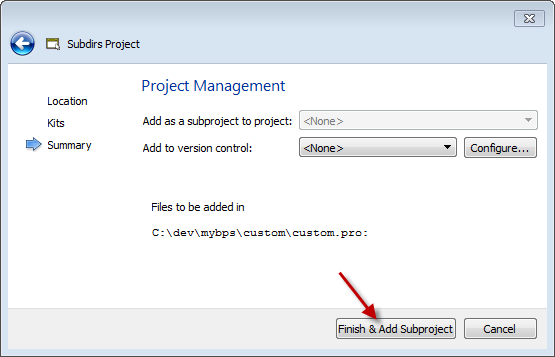
Basically you should now be redirected automatically to a new wizard to set up the first subproject, however this seems not to work with Qt Creator 3.4.0 atm. Nothing to worry about, because we can manually start the wizard to create the subprojects anyway. Just cancel the project wizard for the first subproject to stay in sync with this tutorial in case it came up in your case.
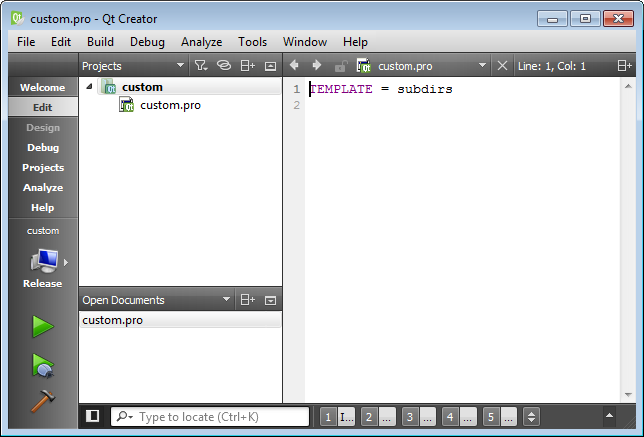
You will now have an empty subdirs project:
QMake Conf File
Before we start creating subprojects, we need to create some utility files.
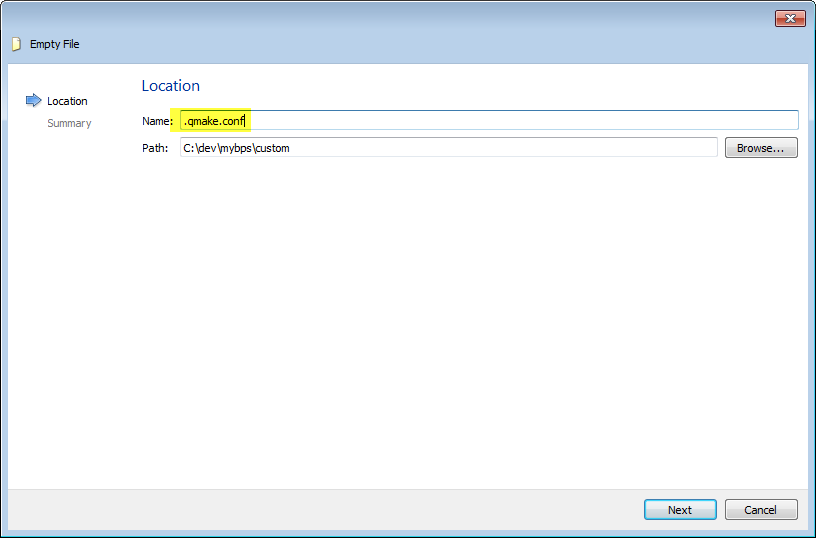
We start with the file .qmake.conf which must be placed in the projects root directory (C:\dev\mybps\custom in my example). The main purpose of this file is to define general QMake instructions which are valid for all subprojects automatically. As a side effect, the presence of this file lets QMake automatically search for feature files in a subdirectory named features, but we will come to that later.
Set focus on the main project (custom in my example) and press Ctrl+N to create a new file. Choose Files and Classes - General - Empty File to create a new empty file named .qmake.conf in the projects root directory:
In the .qmake.conf file enter the two lines as shown to define variables that let us more easy address the main source and build directories. You need not understand the meaning right now, but you may read the QMake documentation in Qt Creators help later to understand and learn how to customize your make process to special needs.
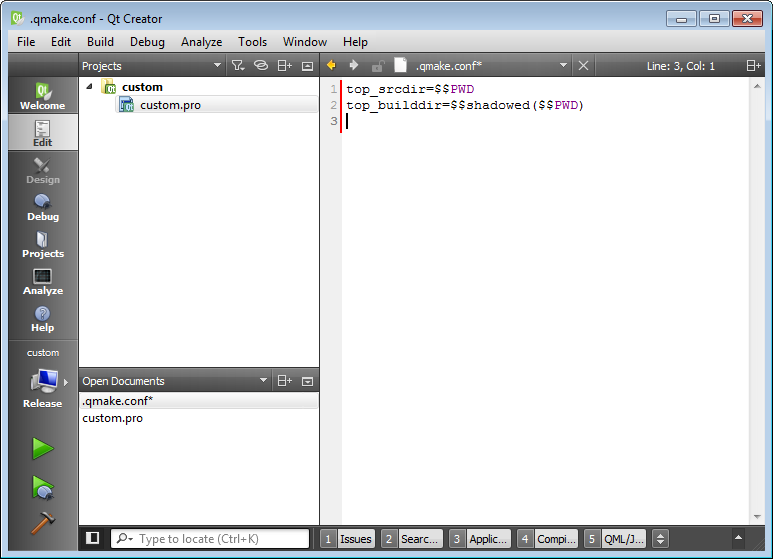
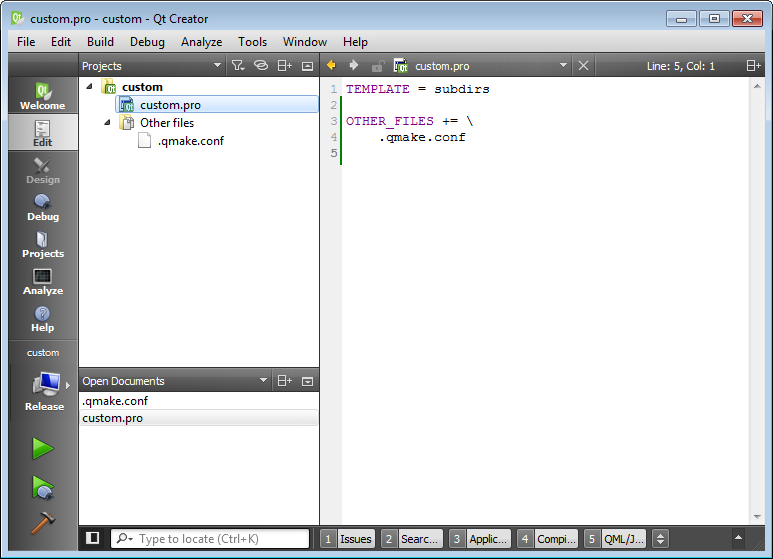
Then edit custom.pro and add the OTHER_FILES statement as shown below. Press Ctrl+Shift+S to save all. After a few seconds the pro file is re-evaluated and .qt.conf should appear in the project tree, so we can easy access it later whenever needed:
Feature files
Feature files are convenient snippets of QMake instructions that can be used by adding the name to QMake's CONFIG variable. There are predefined features from Qt itself (see for example skip_target_version_ext in the screen shot below), and similar we can add our own features with instructions that we want to use in multiple subprojects.
Start by adding the file bpsinit.prf in directory C:\dev\mybps\custom\features. (You need to create the features subdirectory when adding the first feature file). Enter the following content:
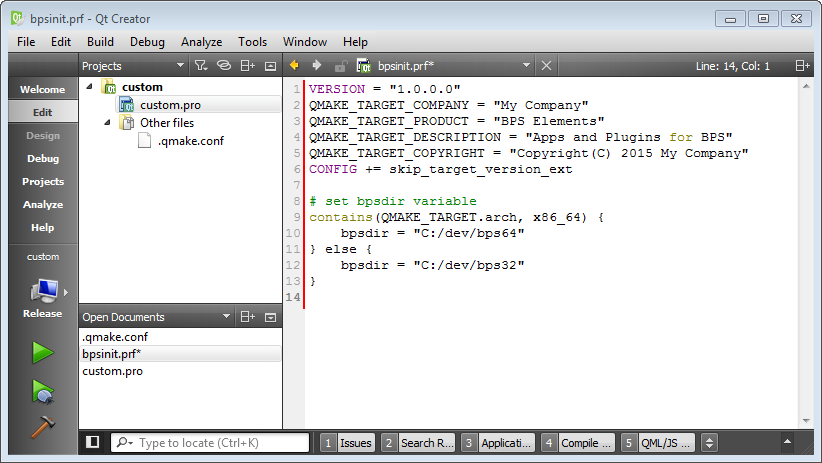
Now lets give some explanations:
VERSIONandQMAKE_TARGET_…
Defines the version and other informations that will be automatically added to the target files, and can be viewed in the file properties. Basically this is not mandatory, but it may help you later identify issues in user installations.CONFIG += skip_target_version_ext
The version defined above shall not be added to the created target file names. Qt is a cross platform development system and some systems have version numbers, for examle shared libraries in Linux. But in Windows we dont want that.contains(QMAKE_TARGET.arch, x86_64)
A conditional that is true whenever a build for 64 bit is active.bpsdir = ….
A self defined build variable with the location where we installed BPS for 64 or 32 bit respectively. In QMake (as in Qt code generally) we can use forward slashes as path delimiters. It is more convenient than using backslashes which must be escaped in various cases, and also it is cross-platform compatible (in case there should ever be need for a port to another system).
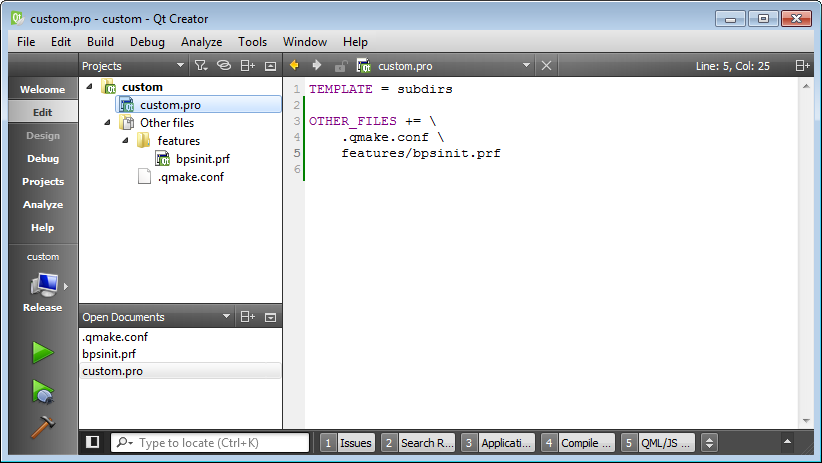
Finally add your feature files to custom.pro for convenience:
We will create some more feature files in the next chapters.
Continue from here with Standalone Applications.