Core Development 32 and 64 bit
See Developing Environment how to set up the (virtual) machine required for BPS development.
Copying from medium
In case you have BPS on a medium (Memory stick, CD, DVD) you have to copy the bps folder from there to C:\dev.
Checkout from mercury
Within IBK the central Mercury repository of BPS is stored on server Alderaan.
- Create folder
C:\dev\bps - Go to
C:\dev\bpsin Windows Explorer - Right click somewhere in folder
- TortoiseHg - Clone…
- Destination:
C:\dev\bps - Options: all unchecked
- Show Detail
- Clone
- Wait until message command completed successfully Shows and TortoiseHg Workbench opens.
- Close clone dialog and workbench
First steps
- Run C:\dev\bps\MakeLinks.bat to create required file and folder links.
- Delete C:\dev\bps\src\bps.pro.user* in case they exist.
- Start Qt Creator
- Open Project
C:\dev\bps\src\bps.pro - Switch to Projects to adjust settings:
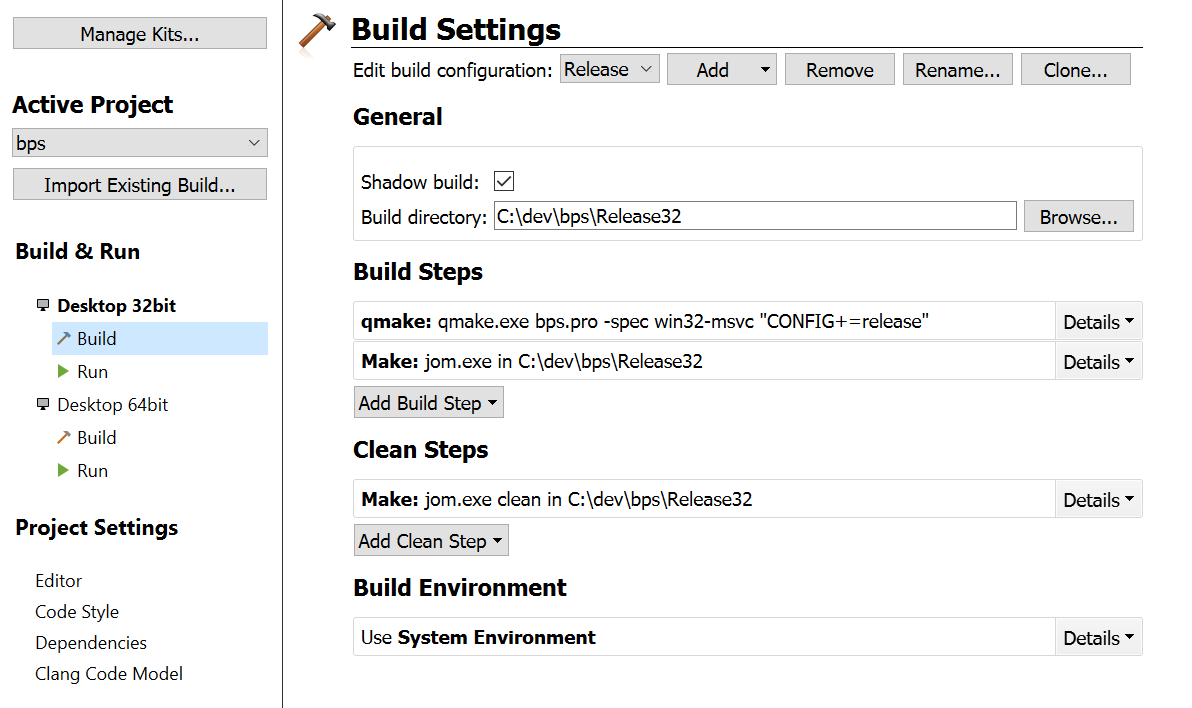
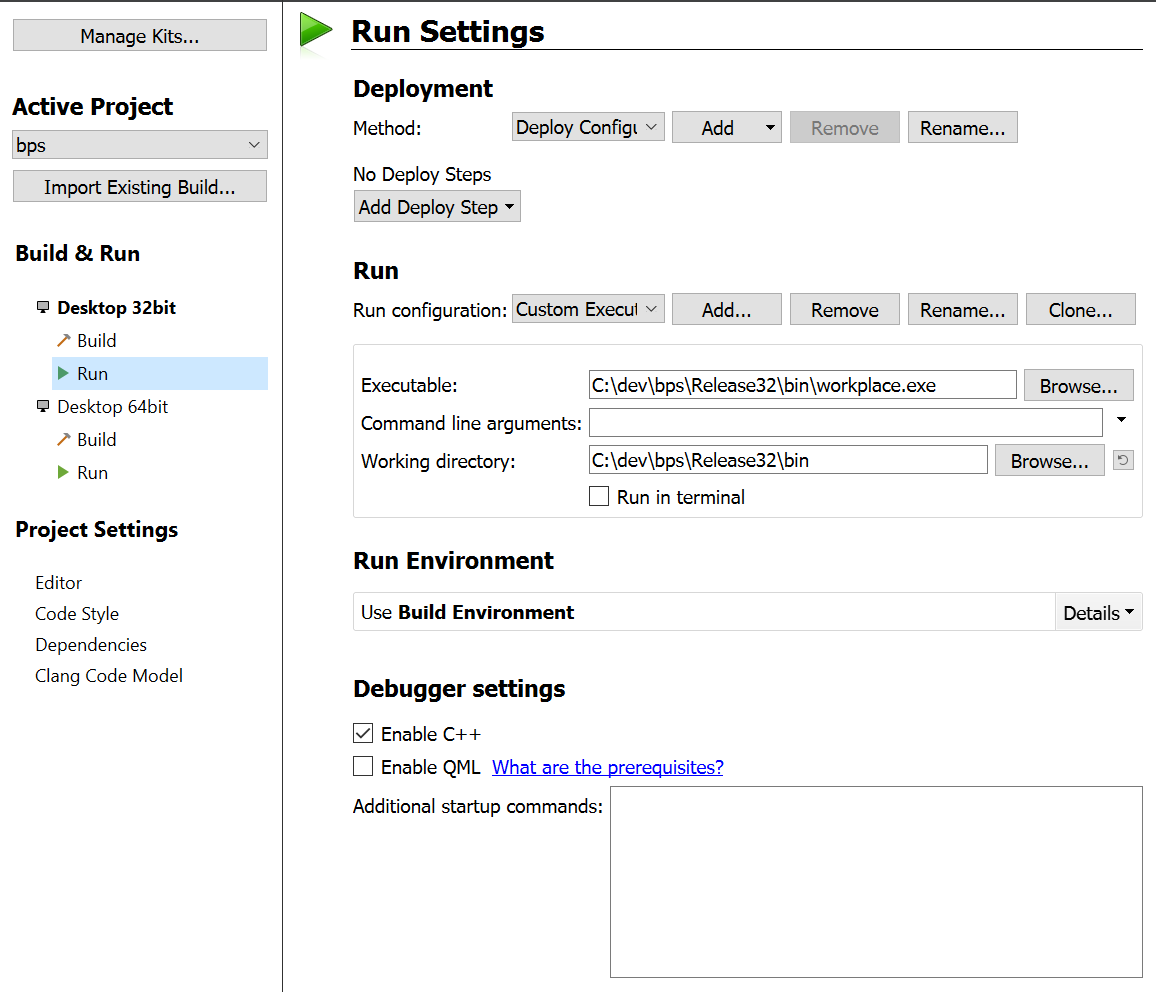
Projects / Build & Run / Desktop 32bit
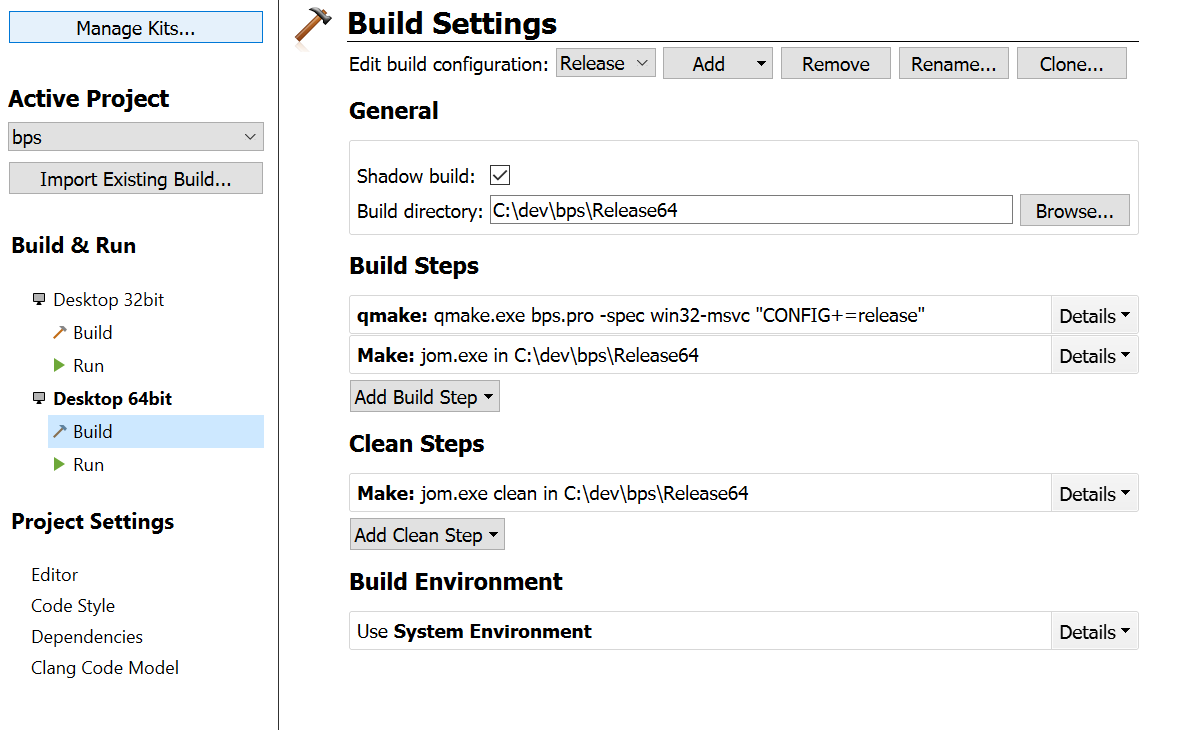
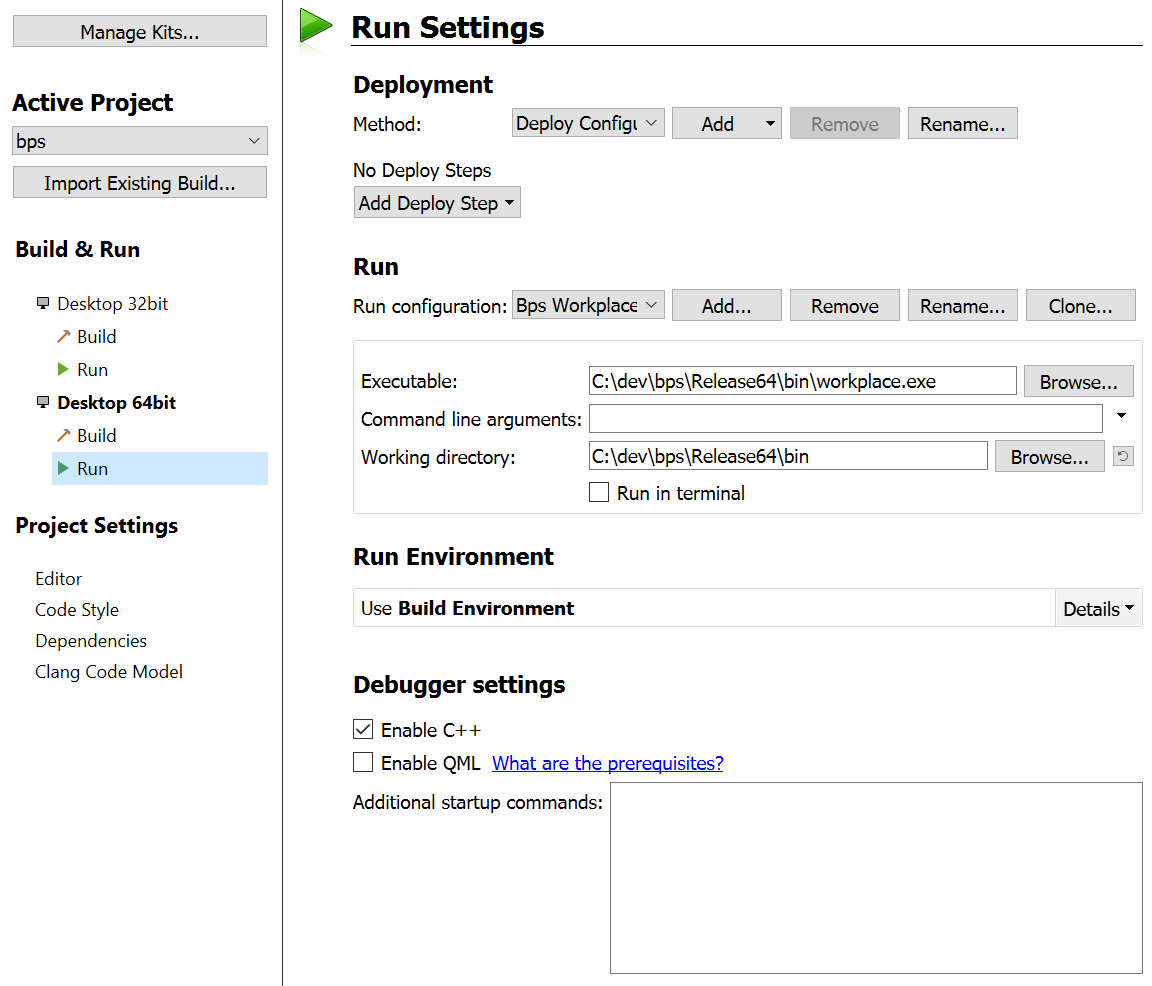
Projects / Build & Run / Desktop 64bit
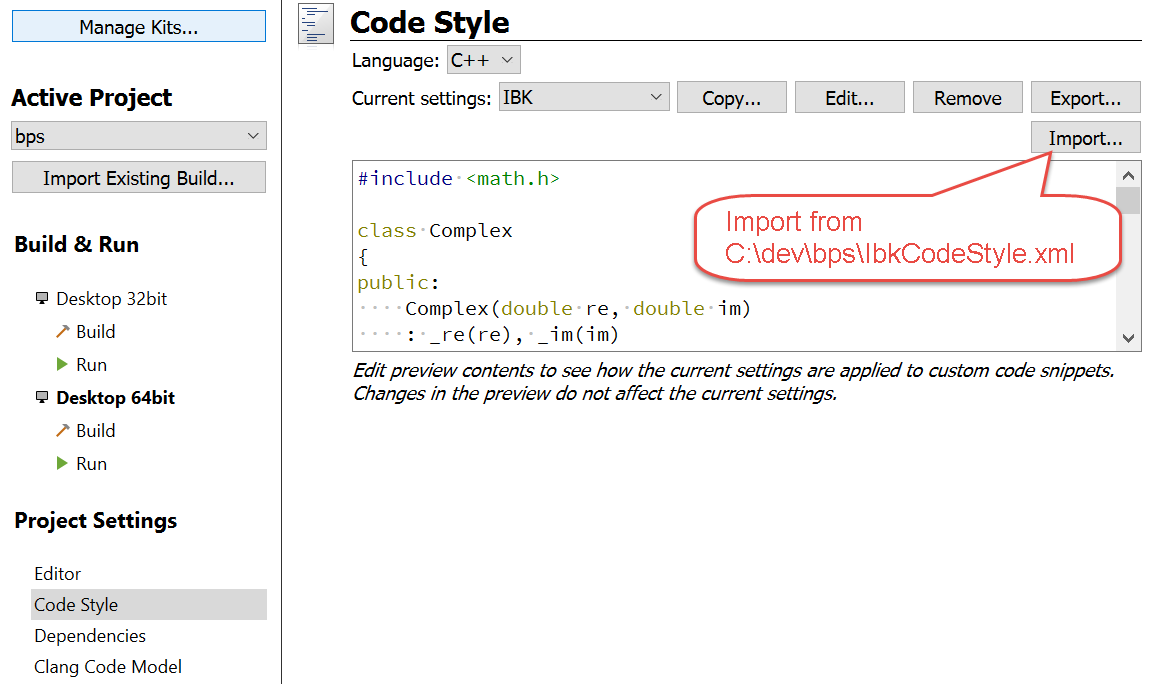
Projects / Project Settings / Code Style
- Switch to Edit to build
- Click on
bps - Build - Build Project „bps“
- Wait until all built
- Run BPS Workplace by clicking the green arrow
Edit Translations
- Open the BPS project in Qt Creator
- Open the .pro file of a sub-project, for example
src/apps/bps/bps.pro - Press Ctrl+Alt+T to start the translate script
- After updating the .ts files, Qt Linguist starts
- When translating the subproject first time, make sure the dictonaries in
C:\dev\bps\src\translationsare opened (bps_de.qph,bps_fr.qph,bps_it.qph). - Edit the translations as desired
- File - Release all
- Close Qt Linguist
Update C++ and script documentation
- Double-click
C:\dev\bps\src\docs\bps2cpp\bps2cpp.doxyfile- When asked what program to use for .doxyfile, select
C:\Program Files\doxygen\bin\doxywizard.exe - In DoxyWizard, select tab Run
- Run doxygen
- Show HTML Output
- Repeat with
C:\dev\bps\src\docs\bps2js\bps2js.doxyfilefor script reference.
Release Checklist
Rebuild Code
- Open project
C:\dev\bps\src\bps.proin Qt Creator. - Edit
bps - Other Files - features - bps_init.prf:VERSION: new version (major.minor.micro.fix)QMAKE_TARGET_COPYRIGHT: years (from-to)
- Edit
bps - libs - bpscore - Headers - bpsglobals.h:BPS_RELDATEBPS_COPYRIGHT_YEARSBPS_COPYRIGHT_TEXT: years (from-to)BPS_DATASTORE_LEVEL_MINBPS_DATASTORE_LEVEL_MAXBPS_VERSION_MAJORBPS_VERSION_MINORBPS_VERSION_MICROBPS_VERSION_FIX
- Select
Desktop 32 Bit - Releasebps- Build - Clean Project „bps“
- Build - Run qmake
- Build - Build Project „bps“
- Select
Desktop 64 Bit - Releasebps- Build - Clean Project „bps“
- Build - Run qmake
- Build - Build Project „bps“
Sign Code
This can only be done at IBK where the signing certificates of IBK are available. If you want to sign outside of IBK, you need get a code signing certificate for your own company.
- Run
C:\dev\bps\SignLibs.bat - Run
C:\dev\bps\SignCode.bat
Create Installers
Creates .msifact clones with new GUID's
Skip this step when releasing a fix version!
- Open command line BPS Release CMD
cd src\installermsiclone bps32 bps64- Generates new files:
bps32-new.msifactbps64-new.msifact
Create 32 Bit Installers
C:\dev\bps\Release32\installer\bps32-new.msifact- Open with MSI Factory (double click)
- When releasing a base version:
- Build - Settings… - Variables
- Adjust
BpsVersionandBpsVersionService
- Build - Settings… - Setup File
- Output name:
bps-$(var.BpsVersion).0-32
- Project - Settings…
- Product version:
$(var.BpsVersion).0 - Find/remove related programs:
- Delete all
- When releasing a fix version (for example fix 3):
- Build - Settings… - Setup File
- Output name:
bps-$(var.BpsVersion).3-32
- Project - Settings…
- Product version:
$(var.BpsVersion).3
- Build - Build Installer (F7)
- Build the installer in all languages.
- After each run rename the created file bps\Release32\setup\bps-2.x.y.z-32.msi to:
- English:
bps-2.x.y.z-32-en.msi - French :
bps-2.x.y.z-32-fr.msi - German :
bps-2.x.y.z-32-de.msi - Italian:
bps-2.x.y.z-32-it.msi
Create 64 Bit Installers
C:\dev\bps\Release64\installer\bps64-new.msifact- Open with MSI Factory (double click)
- When releasing a base version:
- Build - Settings… - Variables
- Adjust
BpsVersionandBpsVersionService
- Build - Settings… - Setup File
- Output name:
bps-$(var.BpsVersion).0-64
- Project - Settings…
- Product version:
$(var.BpsVersion).0 - Find/remove related programs:
- Delete all
- When releasing a fix version (for example fix 3):
- Build - Settings… - Setup File
- Output name:
bps-$(var.BpsVersion).3-64
- Project - Settings…
- Product version:
$(var.BpsVersion).3
- Build - Build Installer (F7)
- Build the installer in all languages.
- After each run, rename
bps\Release64\setup\bps-2.x.y.z-64.msito:- English:
bps-2.x.y.z-64-en.msi - French :
bps-2.x.y.z-64-fr.msi - German :
bps-2.x.y.z-64-de.msi - Italian:
bps-2.x.y.z-64-it.msi
Sign Installers
This can only be done at IBK where the signing certificates of IBK are available. If you want to sign outside of IBK, you need get a code signing certificate for your own company.
- Run
C:\dev\bps\SignInst.bat
Cleanup .msifact Files
After successful builds:
- In
C:\dev\bps\src\installer\- Delete
bps32.msifact - Delete
bps64.msifact - Rename
bps32-new.msifactbps32.msifact - Rename
bps64-new.msifactbps64.msifact
Create Documentation
C++ Reference
C:\dev\bps\src\docs\bps2cpp\bps2cpp.doxyfile- Open with doxywizard (double click)
- Run - Run doxygen
- Generated docs are in
C:\docs\bps\docs\bps2cpp\
Javascript Reference
C:\dev\bps\src\docs\bps2js\bps2js.doxyfile- Open with doxywizard (double click)
- Run - Run doxygen
- Generated docs are in:
C:\dev\bps\docs\bps2js\
Source Control Management
- In
C:\dev\bps\- Right click on empty space, Hg Commit…
- Enter note „Release x.x.x.x“
- Commit
- Right click on empty space, TortoiseHg - Synchronize
- Push outgoing changes
Archive VM
- Shut down VMBPS2
- Close VMware Workstation
- Copy directory of
VMBPS2toVMBPS2xxy(xx=minor,y=micro) - Start VMware Workstation
- Open
VMBPS2xxy/W764.vmx - Rename VM within VMware, change description
- Start up
VMBPS2xxy- Accept „I copied it“ in VMware start question
- Disable Windows Update
- Uninstall TortoiseHg to protect from accidental updates
- Change network name and computer description in Windows
