Basic Scripts
Requirements
To develop scripts for BPS2 you need to know the JavaScript programming language. If you are not yet familiar with the language you may find tutorials and references in the internet for a quick jump. For more ambituous developers wanting to understand JavaScript from ground I recommend the book Javascript The Definitive Guide from David Flanagan (also available in german as JavaScript Das umfassende Referenzwerk).
Tools
Development of simple scripts requires no special tools, a simple texteditor is all it takes, or maybe a convenient developer editor like the free notepad++ editor.
However fo special purposes you need some additional Qt tools:
- For custom GUI dialogs the Qt Designer
- For multilingual scripts
lupdate.exeto extract translatable texts, and the Qt Linguist to do the translation and generate the translation files.
In case you have installed Qt itself for C++ development, you already have these tools. Otherwise you might download it from the Qt Project Site. Make sure to download the same version as used by BPS.
Settings
On your development PC you should have a full installation of BPS, for example in C:\Program Files\IBK BPS 2.19.0. It is recommended to add the bin subdirectory in front of your PATH environment variable, so you dont have to enter the whole path of the BPS exe programs every time you want to start them:
set PATH=C:\Program Files\IBK BPS 2.19.0\bin;%PATH%
You might want to make a permanent setting in the Windows 7 System Properties: Start button, enter SystemPropertiesAdvanced in search edit and press enter key, then press button Environment Variables…
Even more convenient for this purpose is the free Rapid Environment Editor.
Within the installation directory you can find the subdirectory scripts where all the BPS standard scripts are, and scripts\samples where a couple of basic samples are to get started.
Batch Script
Open a command line window, set the PATH (if not yet permanently made), change into the script samples directory and issue the command bps hello1 to execute the first sample:
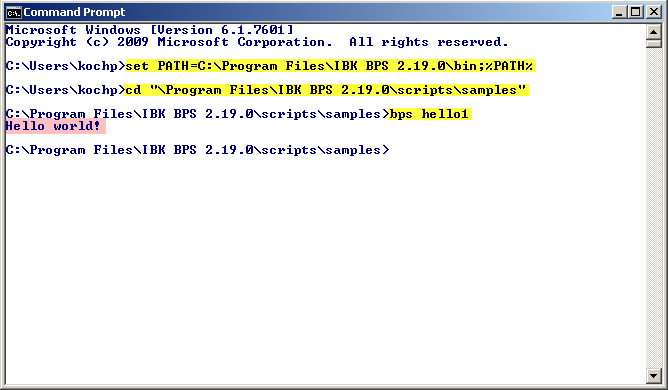
With bps the BPS script interpreter bps.exe is called with hello1 as argument. The argument is automatically interpreted as script file hello1.js in the current directory when given this way.
Besides bps.exe there also exists bpsdeb.exe which calls the Qt script debugger and allows to step through the application, set breakpoints, inspect objects etc. For this very basic test program it makes little sense however, you might use it when your scripts get more complex.
Two more script interpreters, bpsgui.exe and admgui.exe exist to execute GUI scripts; we will be using it in further examples. For now stick with bps.exe to run batch type scripts.
As seen the script just writes out the standard greeting for every first program.
Lets take a look at the script:

If you edit this file you will probably not be able to save it because the installation directory is write protected. You may save the modified file to another directory where you have write permissions, or you can run the editor with admin privileges (not recommended).
It is just one line calling the print function with the greeting text as argument. Beside the JavaScript standard objects and functions you will be using objects and functions of the Qt Script implementation and extensions from BPS.
The print function is basically a Qt script global function, but it is superseeded by a same named BPS replacement. You can therefore find the documentation in the BPS script reference: Global Object Properties. This global object is always present in every BPS script and needs not be included or activated as you see in this basic example.
GUI Script
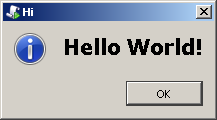
This is the file hello2.js with a similar function, but this time the greating shall be shown in a window:
importExtension('bps.gui');
bps.gui.MessageBox.information(0, 'Hi', '<h1>Hello World!</h1>');
In the first line you see one of the most important global BPS script functions named importExtension. This function allows a script to load a Plugin. BPS itself comes with some standard plugins, and we will see in another chapter how you can create plugins yourself as private libraries. Plugins may either be programmed in C++ or in JavaScript, or a combination of both. The argument given to the function is the plugin path. Plugins are organized hierarchically, for example there exists a standard plugin named bps with BPS objects and functions usable without GUI requirement (as in batch scripts), and a plugin gui located under the bps plugin holding GUI functions and objects where the plugin path name is therefore bps.gui. The script interpreter loads all the plugins included in the path, so there is no need for an extra importExtension('bps') here to use any of the bps plugin objects.
The example uses the information static method of the class bps.gui.MessageBox to show the message in a window. See the documentation of bps.gui.MessageBox for details of the arguments.
Now you could run hello2:
C:\Program Files\IBK BPS 2.19.0\scripts\samples>bps hello2
QWidget: Cannot create a QWidget when no GUI is being used
This error message is given because the bps.exe interpreter runs as a batch (or command line) application, and can therefore not open GUI windows. But there is another script interpreter gui.exe which we must use for our GUI script:
C:\Program Files\IBK BPS 2.19.0\scripts\samples>gui hello2
The MessageBox class is limited to simple dialogs as for error messages or plain questions in style of YES/NO, OK/CANCEL etc. For more complex purposes you will need to create your own custom dialogs with Qt Designer. We will see later how this is done.
But for now first lets see how to create a
Combined Batch / GUI Script
Sometimes it makes sense to create a script that can be run by bps.exe as a batch application, or by gui.exe as a GUI application. Examples of such applications are the standard bps scripts updatedb.js and makeconn.js. They can be run with gui.exe to provide a wizard style dialog, or for more advanced users be run by bps.exe where all relevant parameters are given as command line arguments.
Lets have a look at hello3.js as a very basic sample:
if (isGui) {
    importExtension('bps.gui');
    bps.gui.MessageBox.information(0, 'Hi', '<h1>Hello World!</h1>');
} else {
    print('Hello world!');
}
The global variable isGui tells the script if it is running in a GUI program or in a batch program. Depending on the case, the appropriate script part is then executed.
Custom GUI Dialog
To create custom GUI Dialogs you should first get familiar with the Qt Designer. Read the designer manual at http://qt-project.org/doc/qt-4.8/designer-manual.html.
Not all GUI elements available in the designer can be used, and there are some elements which can be used but not all features are available in scripts. This is because the designer is in first place used for C++ applications, and not all features available in the Qt C++ library are exposed to scripts.
However the common simple elements such as line edits, check boxes etc. can be used, the restrictions apply on more complex elements such as tree and table widgets.
Generally in scripts you have access to the public properties, signals and slots of the Qt classes. Additionally the Qt libraries compiled for BPS expose the following methods as public slots, allthough in standard Qt they are only public methods:
- QListWidget::addItems
- QComboBox:addItems
This enables to use list widgets and combo boxes in BPS scripts too.
Start Qt Designer and select Dialog with Buttons Bottom from the templates:
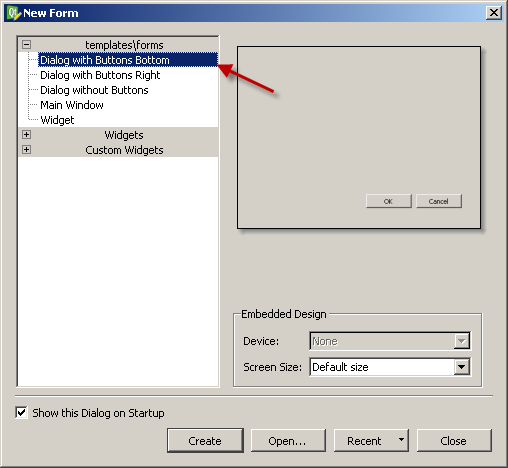
Click the Create button to create the new dialog.
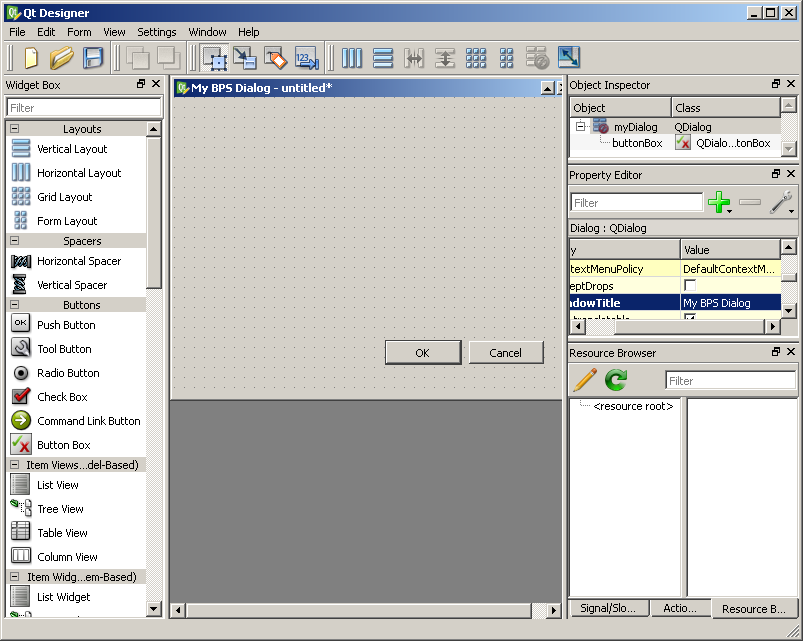
Edit the dialogs properties:
- Change objectName to
mDialog - Change windowTitle to
My BPS Dialog
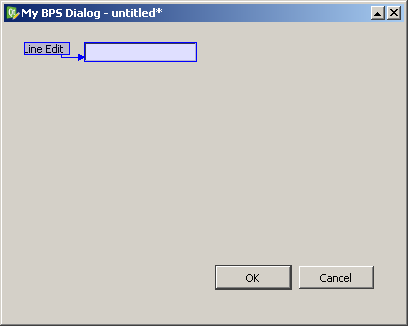
- Add a Label widget to the dialog and edit the properties:
- Change objectName to
mLineEditLabel - Change text to
&Line Edit
- Add a Line Edit widget and edit the properties:
- Change objectName to
mLineEdit
- Switch the designer to Edit Buddies mode
- Connect the label to the line edit
Switch back designer to Edit Widgets mode
- Add a Label widget to the dialog and edit the properties:
- Change objectName to
mComboBoxLabel - Change text to
&Combo Box
- Add a Combo Box widget and edit the properties:
- Change objectName to
mComboBox
- Switch the designer to Edit Buddies mode
- Connect the label to the combo box
Switch back designer to Edit Widgets mode
- Add a Check Box widget to the dialog and edit the properties:
- Change objectName to
mCheckBoxLabel - Change text to
Check &Box
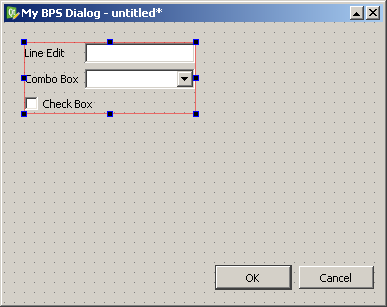
Select all widgets and use the button Lay Out in a Form Layout to align the widgets:
Unselect all, then use the button Lay Out Vertically to align the form with the buttons. Use button Adjust Size to resize the dialog to all elements:
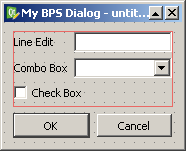
Save the dialog as mydialog.ui to a working directory where you will be creating your own scripts.
Now create the script file mydialog.js in the same directory:
if (!isGui) throw Error("Please use gui.exe to run this script.");
importExtension('bps.gui');
var dialog = bps.gui.loadUiFile(0, bps.gui.uiFileName);
dialog.show();
bps.gui.exec();
In line 3 the user interface file (ui file) with the dialog is loaded. The first argument is the parent widget, in our example it is 0 meaning the desktop is the parent. Parameter 2 is the file name: In case it has the same name as the script file but extension .ui instead of .js you may conveniently use bps.gui.uiFileName, otherwise you need to give the file path and name explicitely.
The next line shows the widget.
Finally with bps.gui.exec() the event loop processing for the dialog inputs (mouse and keyboard events) is executed. The event loop handles all kinds of actions, like moving the windows, reacting to buttons and so on. Execution ends when the last window (by now we just have one) is closed.
Check it out by running the script:
D:\myscripts>gui mydialog
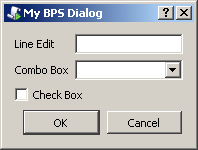
The dialog can be moved around, can get dynamically resized and handles inputs. This is standard processing, but maybe to your surprise it even closes the window and terminates the script when one of the OK or Cancel buttons is pressed.
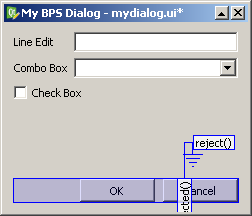
Switch the Qt Designer to Edit Signals/Slots mode and you can see that the template already has wired the accept and reject signals of the buttons to the widgets actions. Signal and slots is the way your script also can react on events happening during the event loop execution.
Now we want to do our own processing when the OK button is pressed:
- Delete the connection from the buttons to the
accept()slot of the dialog. - Rename the buttons widget from
buttonBoxtomButtonBoxfor consistency of our naming. - Save the ui file.
If you run the script now, the dialog will now no longer react on clicking the OK button. We will change that now, so change the script to the final version:
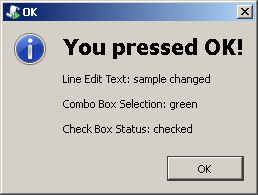
if (!isGui) throw Error("Please use gui.exe to run this script.");

importExtension('bps.gui');

// get widgets
var dialog = bps.gui.loadUiFile(0, bps.gui.uiFileName);
var lnedit = dialog.findChild('mLineEdit');
var cmbbox = dialog.findChild('mComboBox');
var chkbox = dialog.findChild('mCheckBox');
var buttons = dialog.findChild('mButtonBox');

// slot functions
function okPressed()
{
    bps.gui.MessageBox.information(
        dialog, 'OK',
        '<h1>You pressed OK!</h1>'+
        '<p>Line Edit Text: ' + lnedit.text + '</p>' +
        '<p>Combo Box Selection: ' + cmbbox.currentText + '</p>' +
        '<p>Check Box Status: ' + (chkbox.checked ? 'checked' : 'unchecked') + '</p>'
    );
    dialog.accept();
} // okPressed

// make connections
buttons.accepted.connect(okPressed);

// initialize inputs
lnedit.text = 'sample text';
cmbbox.addItems(['red', 'green', 'blue']);

// execute
dialog.show();
bps.gui.exec();
As shown in the get widgets section the findChild method of the dialog is used to get references to the input and button widgets. This function is convenient, because sometimes the widgets are not direct children auf the main dialog or window, but burried in layouts or other helper widgets.
okPressed() is a slot function that shall get called when the accepted signal of the buttons is fired. You can see in the section make connections how this is done.
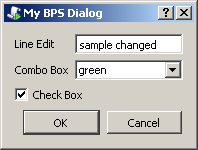
In section initialize inputs the line input gets a default text, and the drop down list of the combo box is populated.
Check out the script now:
You should now be able to work yourself deeper into the GUI scripting topic. Check out and try to understand the standard scripts and ui files (for example makeconn or createdb) as real life examples.